Game Version 1.0 - Instructions
Note: you can only upload worlds also generated in the same version the server is using
- Every world you generate is saved in its own folder that can usually be found at:
%appdata%\Roaming\7 Days to Die\Saves\<NAMEOFWORLD> - If it's a randomly generated world, you will also need the
GeneratedWorldsfolder found at:%appdata%\Roaming\7 Days to Die\GeneratedWorlds
Zip up the "Saves" folder - Must be .zip, not .rar/.7z etc
How to do that: right-click the Saves folder, hover over "Send To" then click "Compressed (zipped) Folder"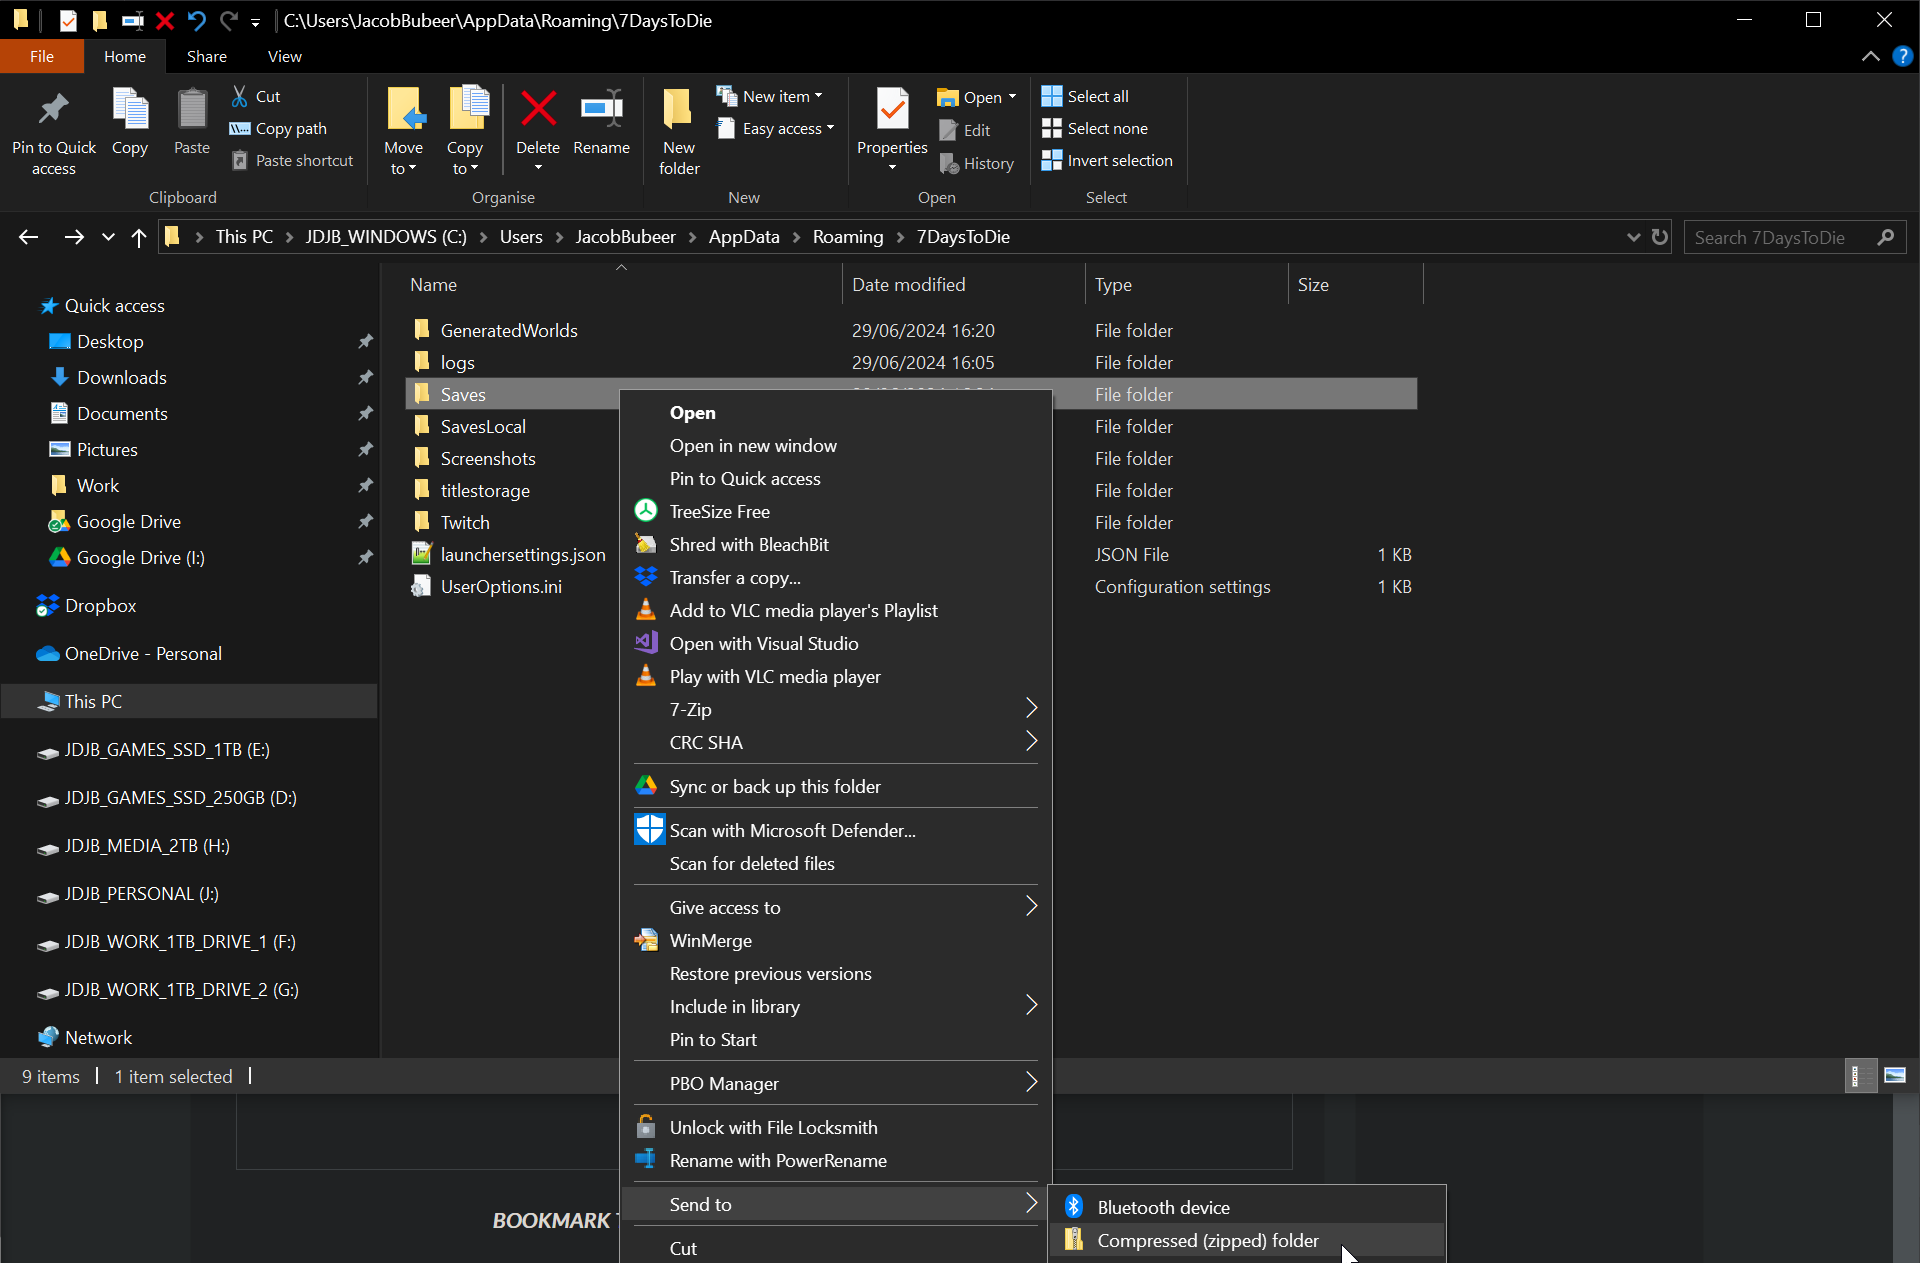
Zip up the "GeneratedWorlds" folder - Must be .zip, not .rar/.7z etc
How to do that: right-click the Saves folder, hover over "Send To" then click "Compressed (zipped) Folder"
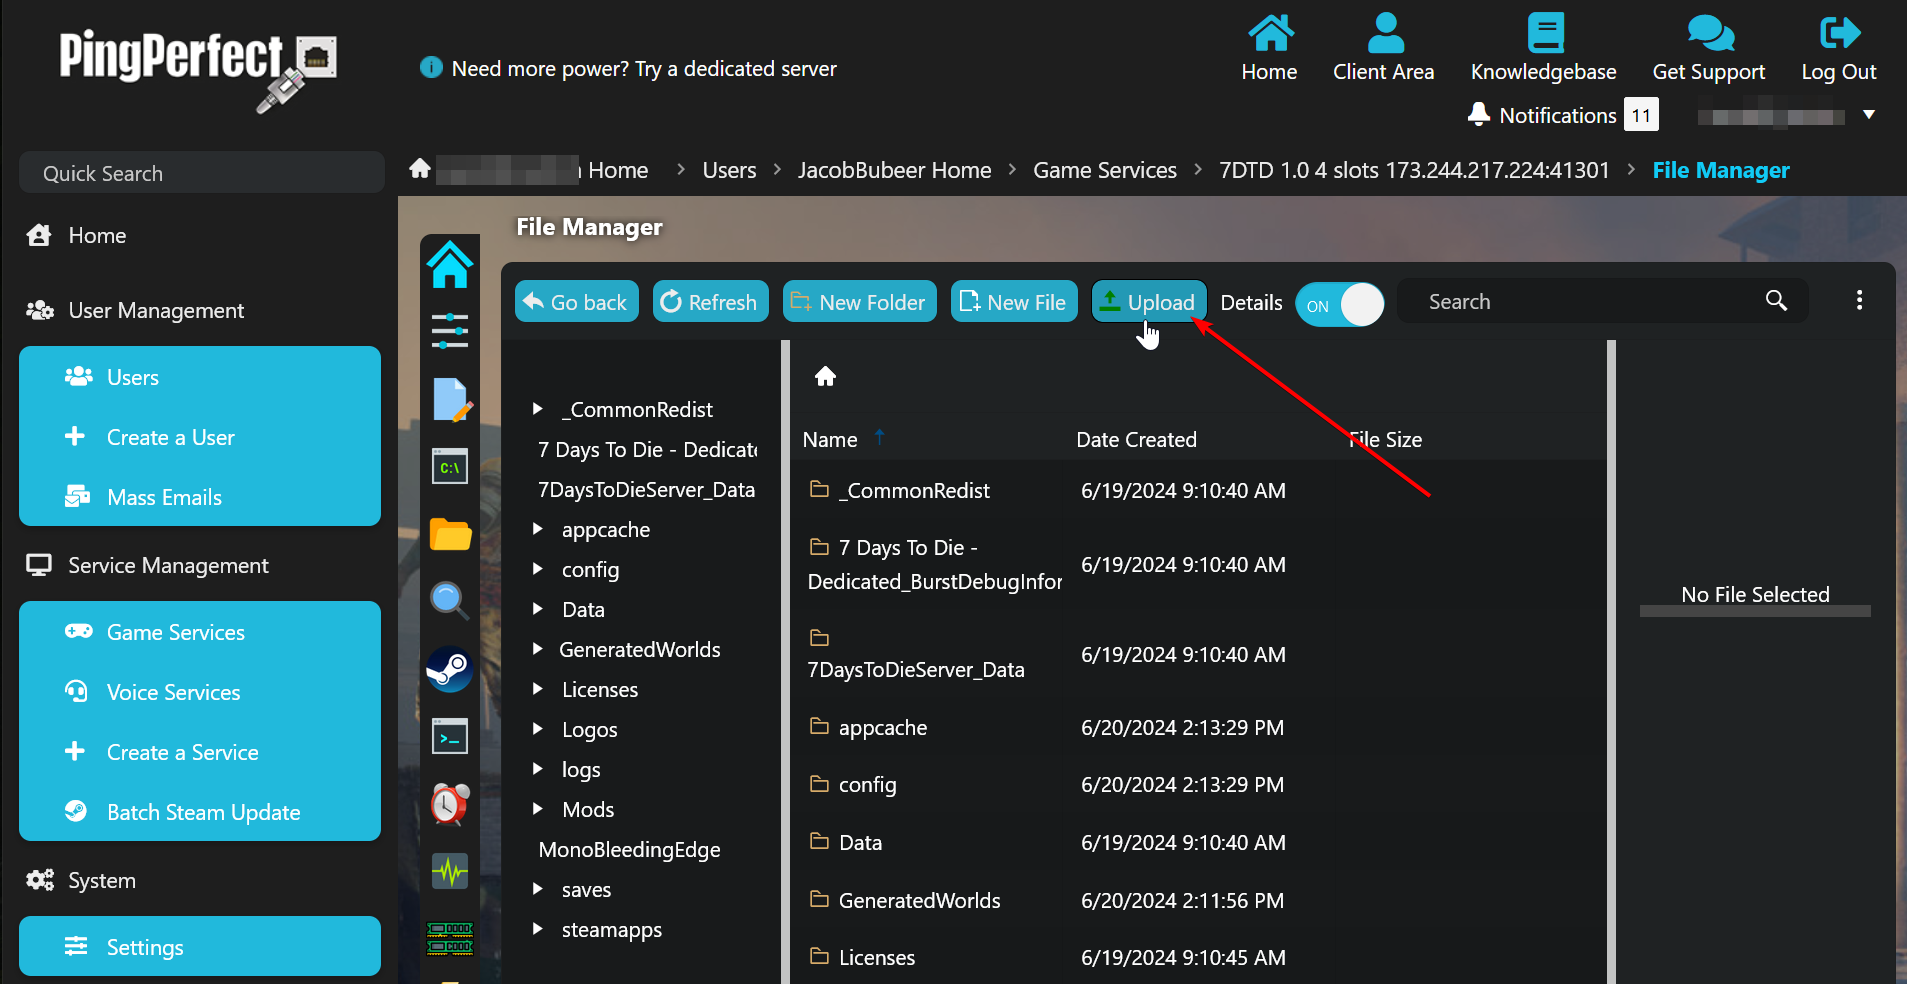
- Log into your game panel → game services → select your server
- Click "File Manager" then click "Upload"
- a) Click "Select Files..."
b) In the pop out window, navigate toC:\Users\<YourPCUserName>\AppData\Roaming\7DaysToDie
c) Select the GeneratedWorlds.zip folder and click "Open"
d) Click "Select Files..."
e) In the pop out window, navigate toC:\Users\<YourPCUserName>\AppData\Roaming\7DaysToDie
f) Select the Saves.zip folder and click "Open"
Note - Some files can be too large for the File Manager, if you find this to be the case, please use FTP to upload your zipped files. https://pingperfect.com/index.php/knowledgebase/19/Accessing-your-files.html - Right-click the "GeneratedWorlds.zip" and click "Extract"
Right-click the "Saves.zip" and click "Extract"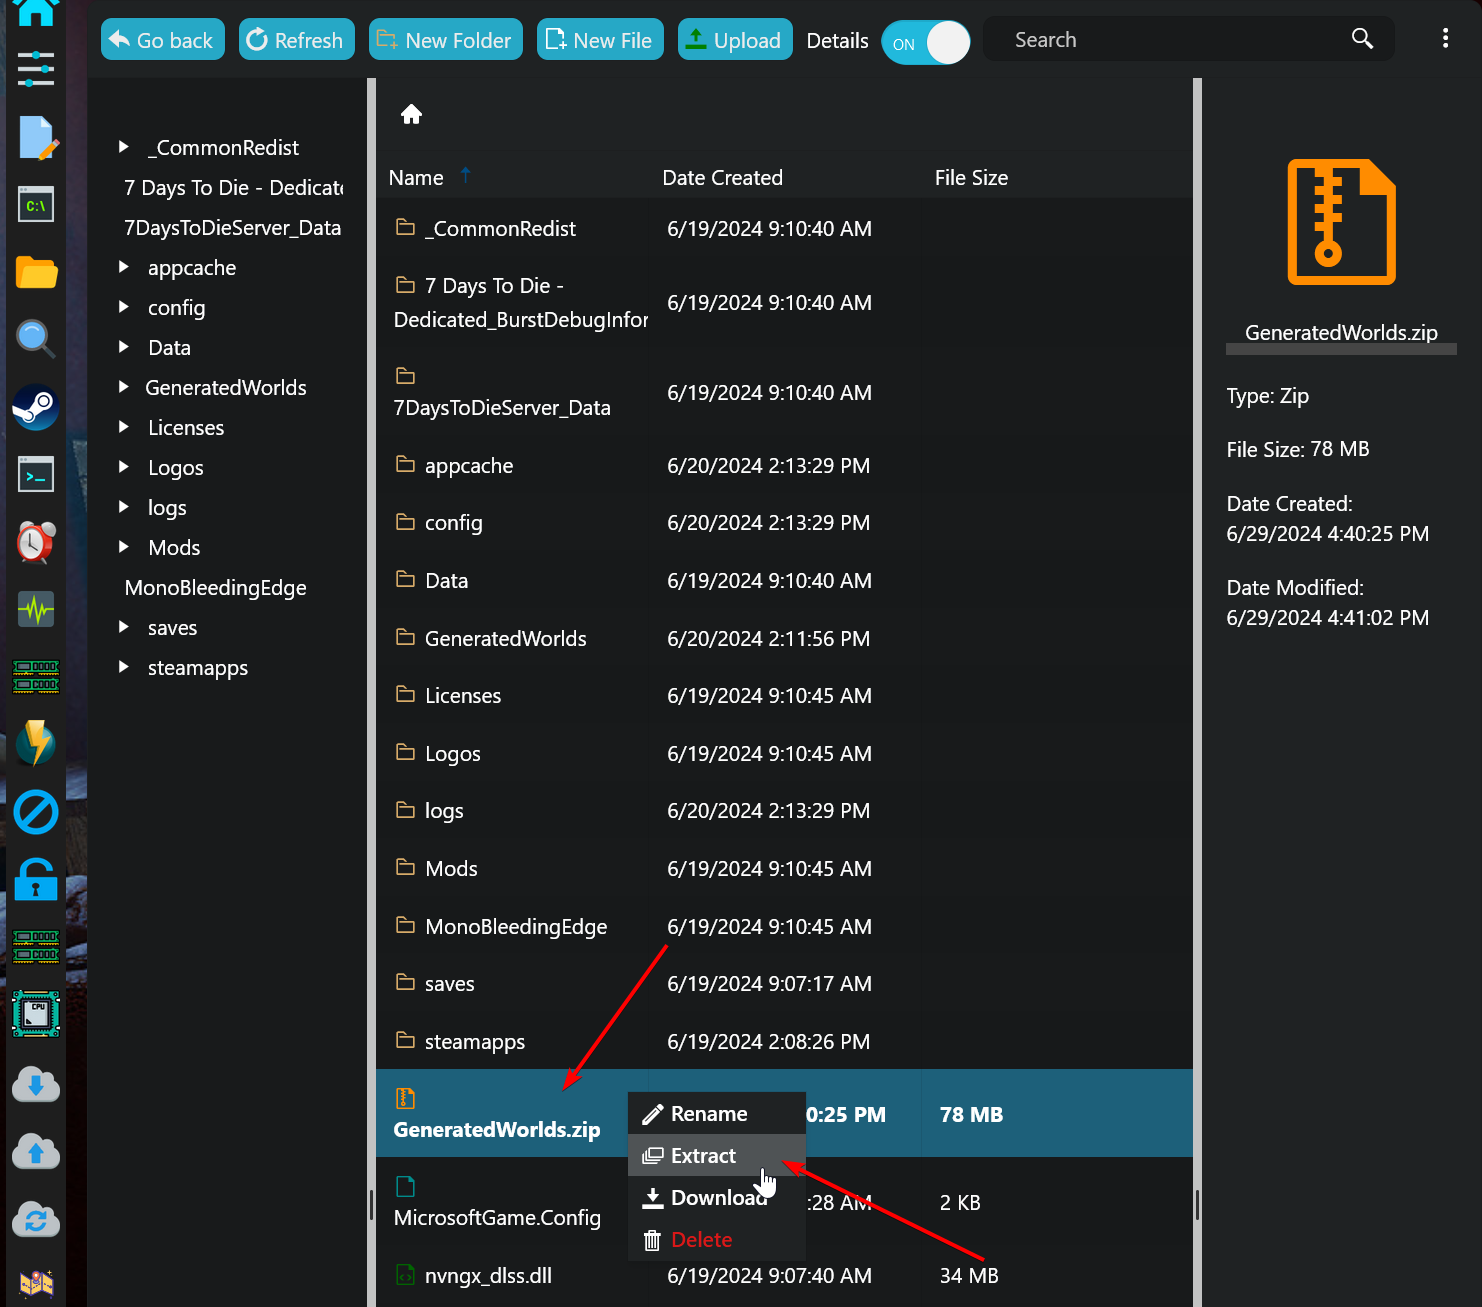
- Go back to gamepanel home page. Select configuration files → configuration editor and edit the pingperfect.xml config
- Set "Game World" in pingperfect.xml to the same name as the world folder inside "GeneratedWorlds"
Example: Zuheja Territory - Set the "Game Name" field to the exact name of your save folder in the folder below the map-name, in the "Saves" folder
Example: World uploaded is Saves\Zuheja Territory\TESTING123, you would enter "TESTING123" in the game name field - In the config file, set the seed and map size to the same values as were used when the world was created.
- Save config and start your server.
Alpha 21 and BELOW - Instructions
Note: you can only upload worlds also generated in the same version the server is using
- Every world you generate is saved in its own folder that can usually be found in
%appdata%\Roaming\7 Days to Die\Saves\<NAMEOFWORLD> - If it's a randomly generated world, you will also need the
GeneratedWorldsfolder found at%appdata%\Roaming\7 Days to Die\GeneratedWorlds
Zip up the entire "Saves" folder containing the world folder and the generated worlds folder - Must be .zip, not .rar/.7z etc
- Log into your game panel → game services → select your server
- Go to file manager and go into the "Saves" folder, upload your zipped "Saves+GeneratedWorlds" folder then click it after its finished uploading and select unzip.


Note - Some files can be too large for the File Manager, if you find this to be the case please use FTP to upload your zipped files. https://pingperfect.com/index.php/knowledgebase/19/Accessing-your-files.html - Once the folder has unzipped you should see
Saves\<MAPNAME>\<NAMEOFWORLD>, exit the file manager and select configuration files → configuration editor and edit the pingperfect.xml config - Set "Game World" in pingperfect.xml to the same name of the world folder immediately under Saves (Zuheja Territory in this example)
- Set the "Game Name" field to the exact name of your save folder in the folder below the map-name
Example - World uploaded is Saves\Zuheja Territory\TEST, you would enter "TEST" in the game name field - In the config file set the seed and map size to the same values as were used when the world was created.
- Save config and start your server.
Pre-A18 Instructions
1. Every world you generate is saved in its own folder that can usually be found in c:\Users\{YOUR WINDOWS USERNAME}\Documents\7 Days to Die\Saves
Zip up the folder that is your save folder AND the generatedworlds folder(Must be .zip, not .rar/.7z etc)
2. Log into your game panel > game services > select your server
3. Go to file manager and go into the "Saves" folder, upload your zipped save folder then click it after its finished uploading and select unzip. Ensure you have the correct path for the world type you are uploading. For example
If you have a Navezgane world named Pingperfect you should upload the Pingperfect folder to
Saves\Navezgane
If you have a Random world named Pingperfect you should upload the Pingperfect folder to
Saves\Random
Note - Some files can be too large for the File Manager, if you find this to be the case please use FTP to upload your zipped files. https://pingperfect.com/index.php/knowledgebase/19/Accessing-your-files.html
4. Once the folder has unzipped you should see Saves\World Type\Your world name, come out of file manager and go into configuration files > configuration editor
5. Ensure the "Game Name" is the exact same as the world name you just uploaded.
Looking for a game server host known for brilliant 24/7 customer support and quality hardware?
Try a Pingperfect 7 Days to Die server today! https://pingperfect.com/gameservers/7dtd-7days-to-die-server-hosting.php
