Using custom workshop maps on your TF2 server is fairly straightforward, the following process explains how to do this.
FINDING AND DOWNLOADING A MAP FROM THE WORKSHOP
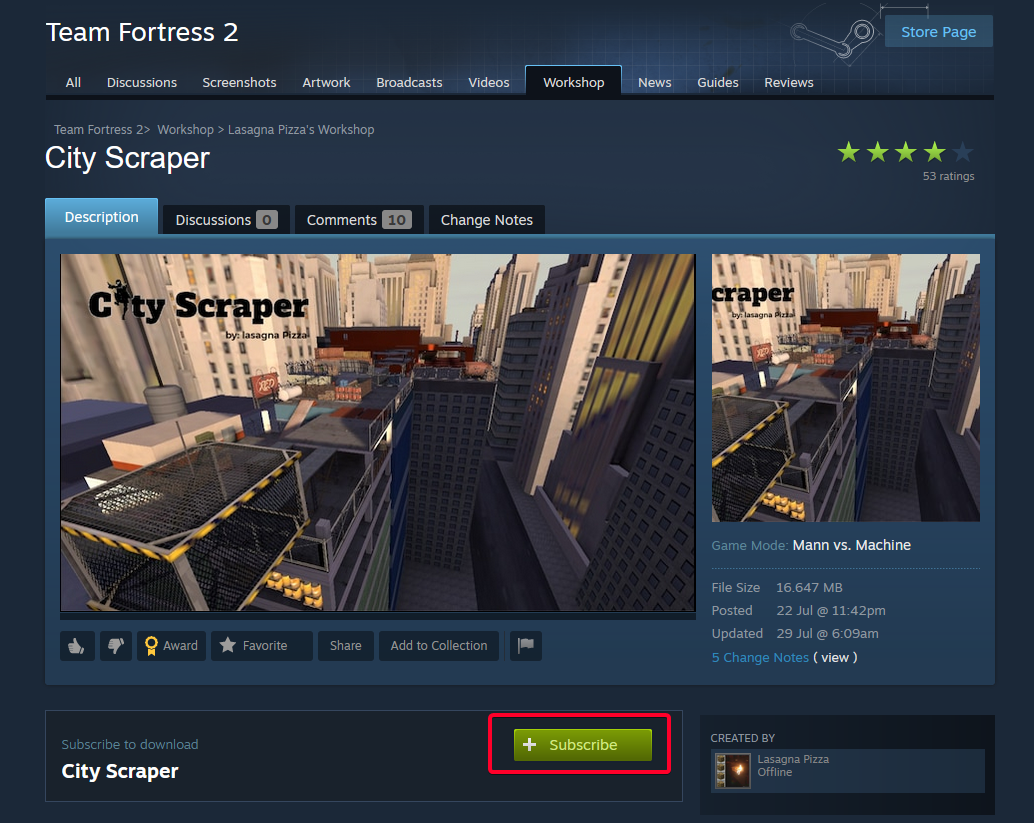
- Find a map that you would like to add to your server from the TF2 Steam Workshop and click the subscribe button.
- Now that you have subscribed to the map, it should download the file automatically to your local TF2 files, however just launch the game once after subscribing to be sure.
- Open up your local TF2 Steam files, you can do this using your Steam client (see screenshots below):
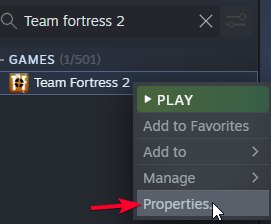
- Go to your Steam library and find your TF2 game, right-click and go to properties.
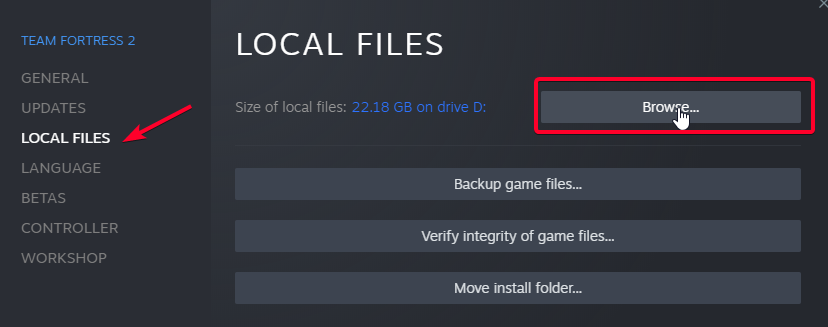
- When the game properties box comes up, navigate to 'Local Files' on the left and then click the 'Browse' button, this will open up the game files location on your PC.
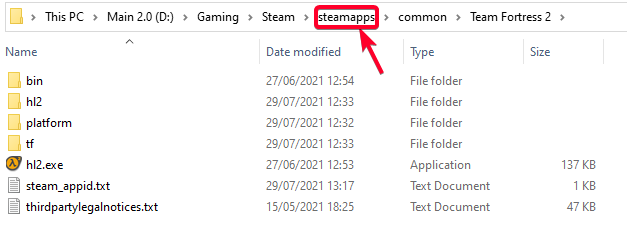
- Now that you are in the main TF2 file location, you need to navigate to the 'steamapps' file location.
- Now that you're inside of the steamapps folder, navigate to 'workshop > content > 440' and open the relevant content folder for your map.

- Then after identifying your map, make a copy of the BSP file of the map you subscribed to and save it somewhere easy to access such as your desktop.
- Go to your Steam library and find your TF2 game, right-click and go to properties.
UPLOADING THE WORKSHOP MAP TO YOUR SERVER
Now that you have your map file saved in an easy-to-access location, we can begin uploading the map to the server.
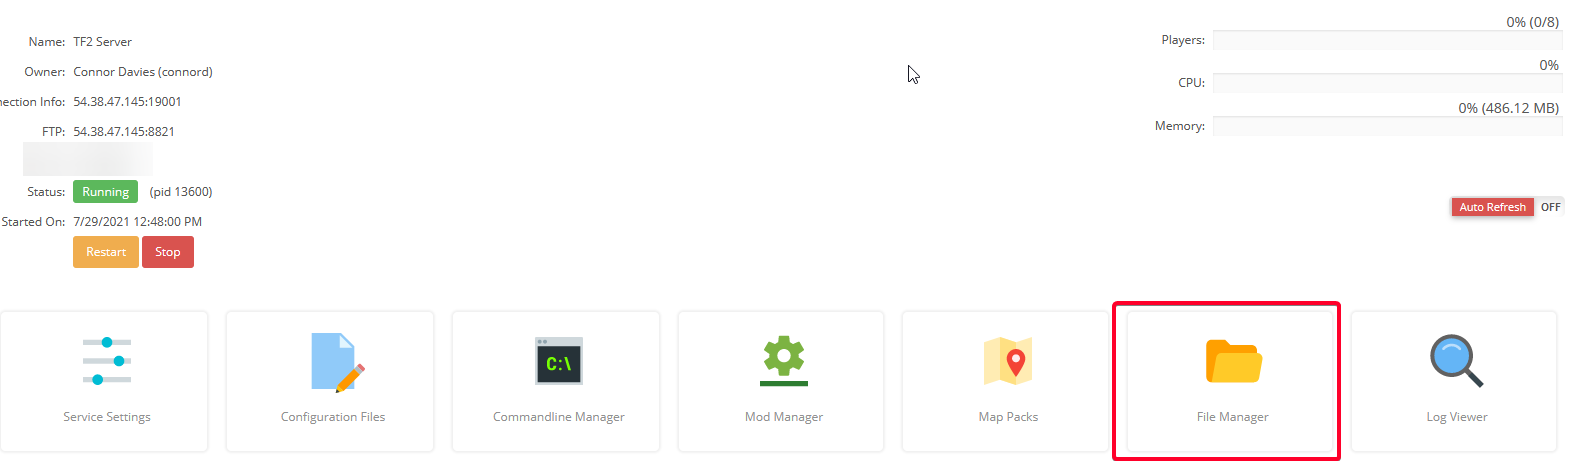
- Navigate to your PingPefect TF2 gamepanel (your server control panel) and navigate into the 'File Manager'
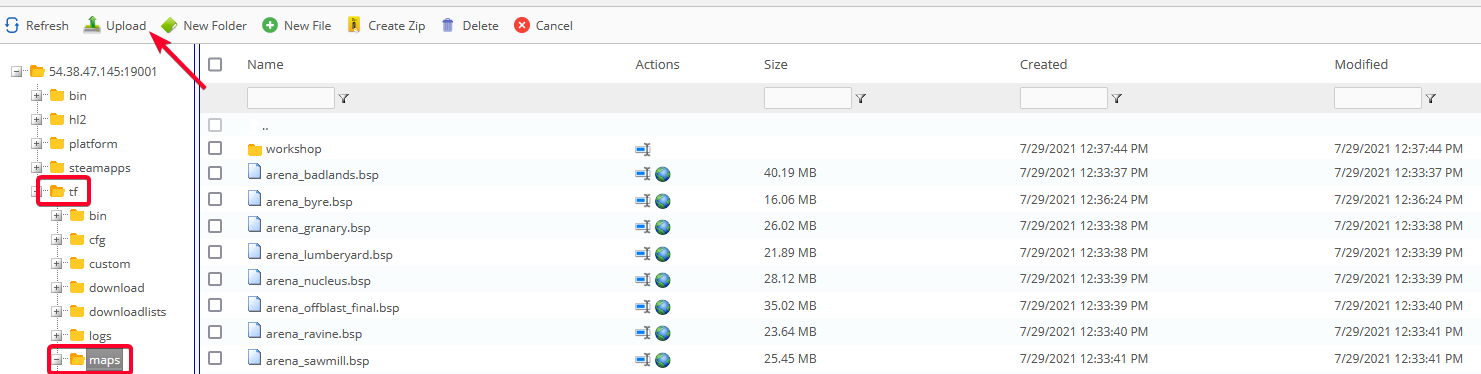
- Within the File Manager, you want to navigate into 'tf > maps' and within the maps folder, you will then need to upload the map you downloaded and saved previously.
- Click the upload button in the maps folder at the top of the page to begin the upload of the map file.
- Then click the 'Browse'
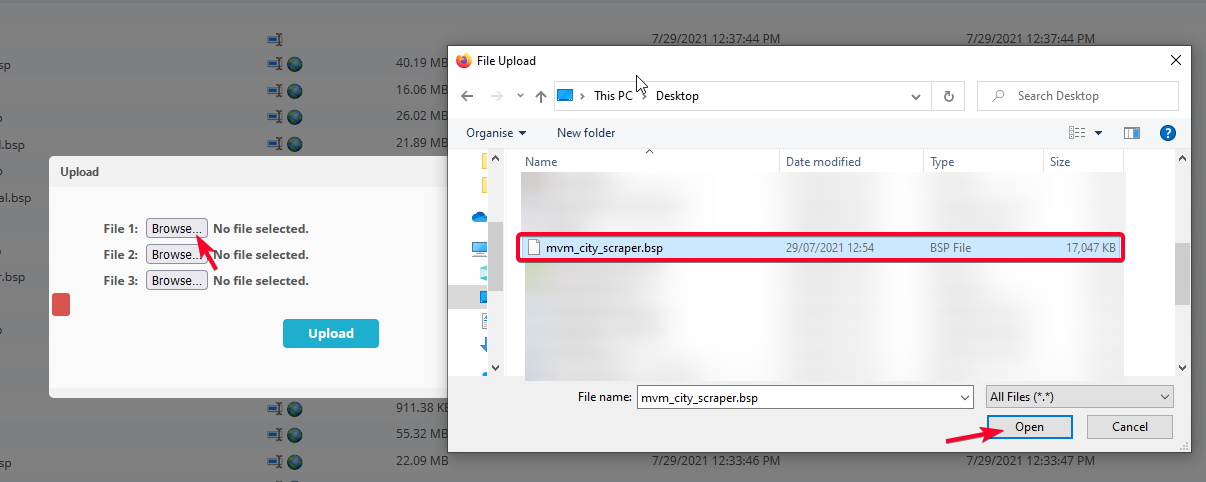
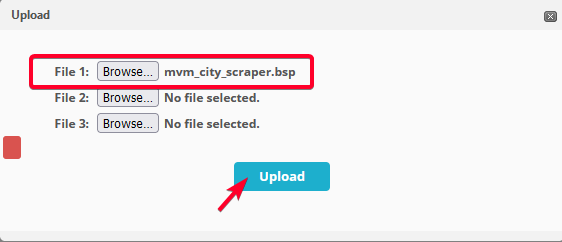
- Once you have selected the map file and opened it, click the upload button which will upload the file to the server's files.
- Click the upload button in the maps folder at the top of the page to begin the upload of the map file.
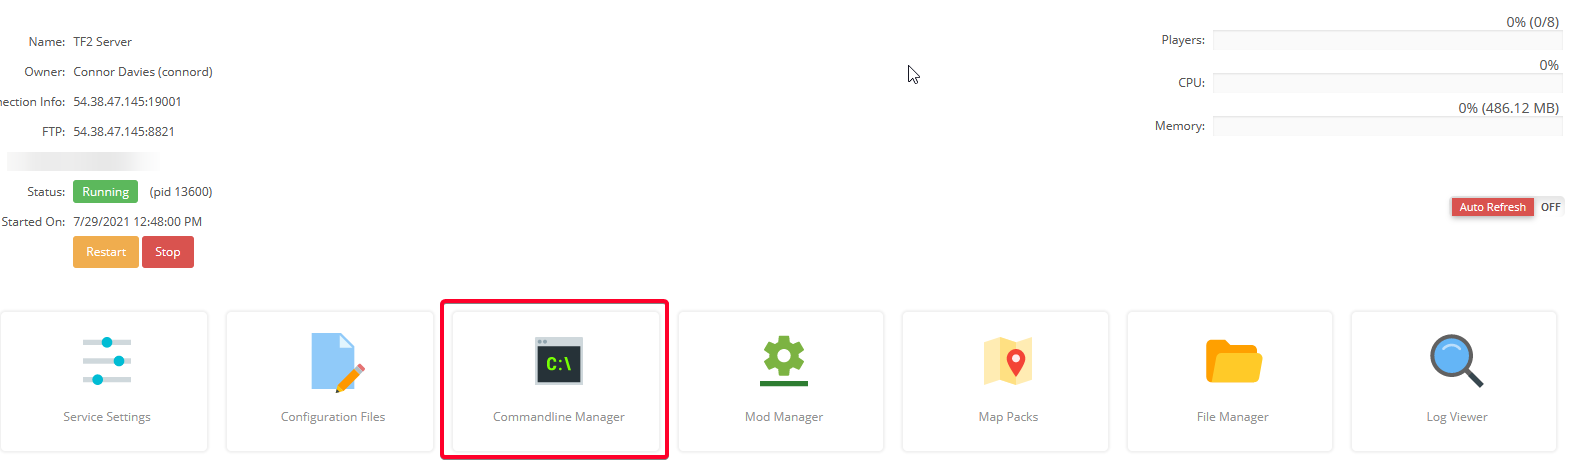
- Now that the map file has been uploaded to the server, the server now has to be told to use it, you can do this by navigating to the 'Commandline Manager' in the gamepanel.
- Inside of the commandline manager you will need to navigate to 'Custom Commandline' at the top of the page and click 'new' and give the command line an identifiable description of your choice.
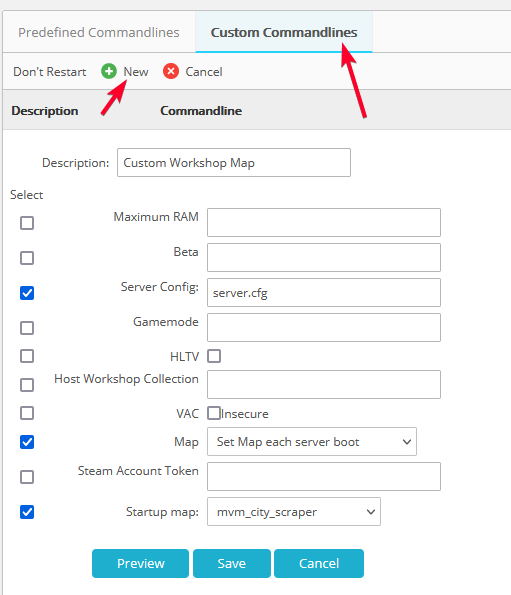
- Make sure that you select the same options and your command line options look the same as the highlighted options below, the only thing that will be different is the 'Startup Map' - this will be the map file that you uploaded to the server in Step 2.
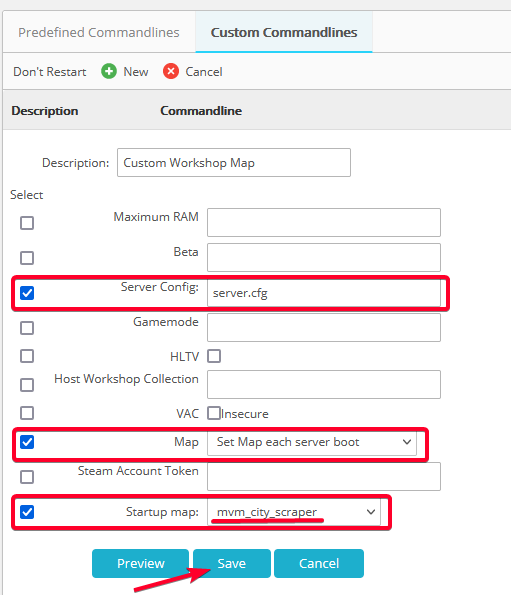
- Once you have saved the command line, you will need to select it for the server to run using that command line and the new map you selected using the 'select' button next to the command line.

- Inside of the commandline manager you will need to navigate to 'Custom Commandline' at the top of the page and click 'new' and give the command line an identifiable description of your choice.
- Connect to the server and enjoy your new map!
Looking for a game server host known for brilliant 24/7 customer support and quality hardware?
Try a Pingperfect Team Fortress 2 (TF2) server today! https://pingperfect.com/gameservers/team-fortress-2-game-server-hosting-rental.php
